
How to Recover Deleted Files Mac
Accidentally deleting important files on your Mac can be a heart-sinking experience. Fortunately, several methods are available to help you recover those lost files and breathe a sigh of relief.
How to Recover Deleted Files Mac? In this article, we’ll explore seven effective ways to recover deleted files on a Mac, outlining step-by-step instructions and the pros and cons of each method.
Method 1: Check the Trash
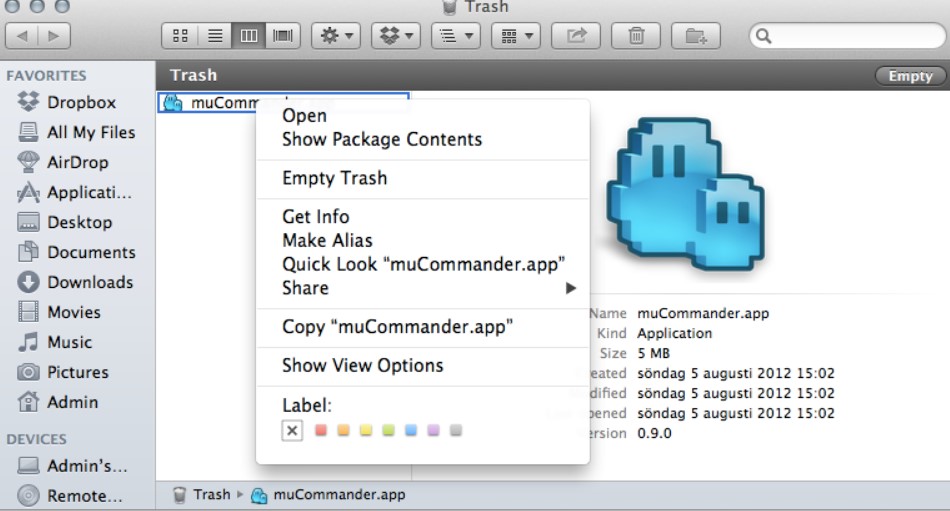
When you delete a file on your Mac, it’s often moved to the Trash first. This acts as a safety net if you need to restore the file. Follow these steps to restore files Mac OS from Trash:
- Open the Trash by clicking on its icon in the Dock.
- Locate the deleted file in the Trash.
- Right-click on the file and select “Put Back” to restore it to its original location.
Pros
- Simple and quick
- No need for third-party software
- Files can be easily restored to their original location
Cons
- If the Trash is emptied, the files are permanently deleted
If your Trash folder on your Mac has been manually or automatically emptied, don’t worry! Keep reading. We have other methods that allow you to recover permanently deleted files on Mac.
Method 2: Time Machine Backup
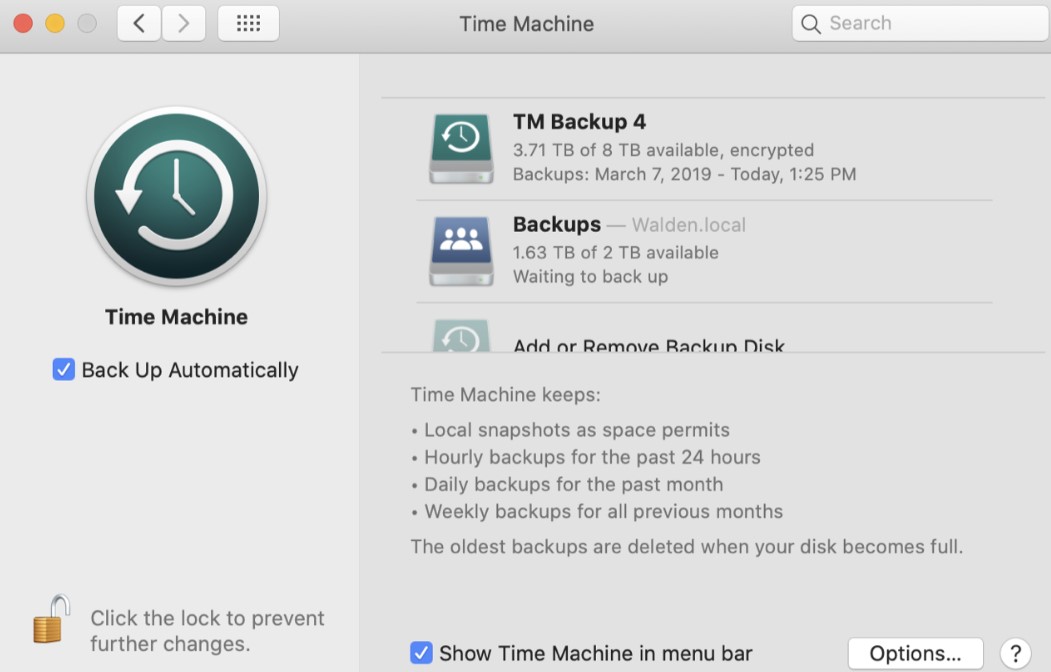
If you’ve set up Time Machine, Apple’s built-in backup solution, you can restore your system to a previous state and recover deleted files. Follow these steps to fix the Mac file from Time Machine:
- Connect your Time Machine backup drive to your Mac.
- Click the Apple menu bar, select “System Preferences,” then choose “Time Machine.”
- Use the timeline on the right to navigate to the date when the file existed.
- Find the deleted file, select it, and click “Restore.”
Pros
- Recovers files from various points in time
- Integrated into macOS
- Can restore entire system configurations
Cons
- Requires an external backup drive
- Must have enabled Time Machine before file deletion
Setting up a backup via Time Machine allows you to sleep quickly, knowing no matter what happens to your Mac, you can restore your precious files. However, if you haven’t set up Time Machine, we will show you a few methods to regain your data!
Method 3: iCloud Drive
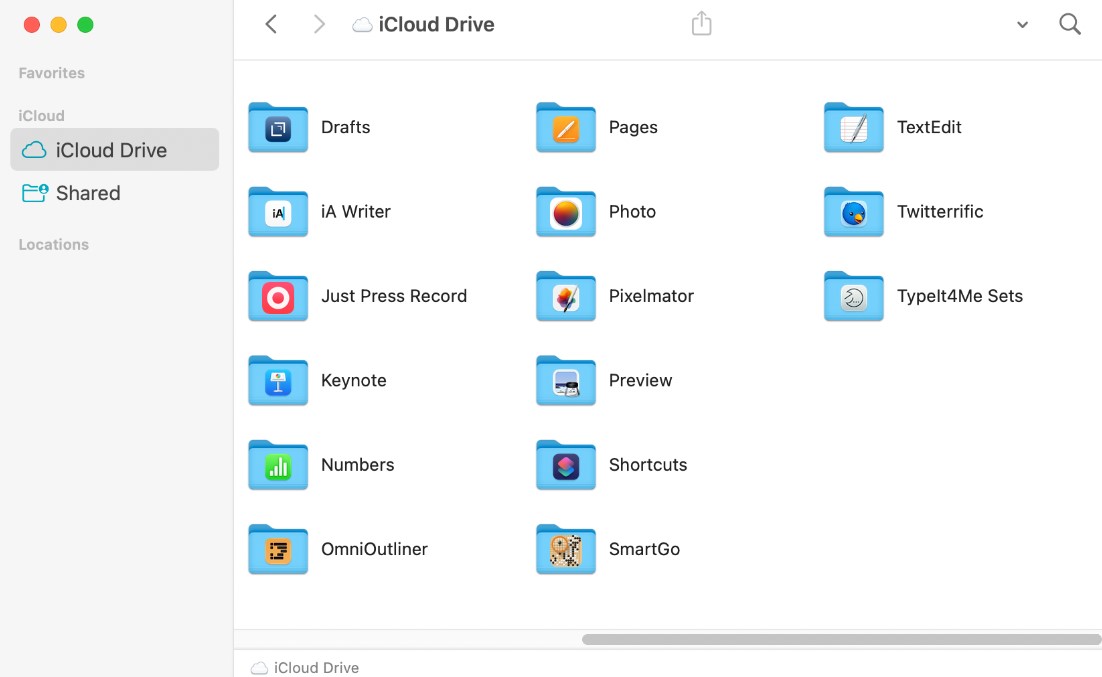
iCloud is Apple’s cloud-based service that enables Mac users to store and sync various types of data across their devices, including photos, documents, contacts, and more, providing seamless access and backup.
If you use iCloud Drive to store your files, deleted files may be recoverable from the cloud storage. To get your files back via iCloud, follow these steps:
- Open a web browser and visit iCloud.com.
- Log in with your Apple ID credentials.
- Click on “Settings,” then scroll down to “Advanced” and select “Restore Files.”
- Select the files you want to recover and click “Restore.”
Pros
- No need for additional hardware
- Can recover files from any device with internet access
- Offers an extra layer of backup for iCloud Drive users
Cons
- Limited to files stored in iCloud Drive
- Requires an internet connection
iCloud is the most effective way to recover your Mac files. Unfortunately, it can’t be set after the data loss incident. To get your files back without backup, try the methods below.
Method 4: Data Recovery Software
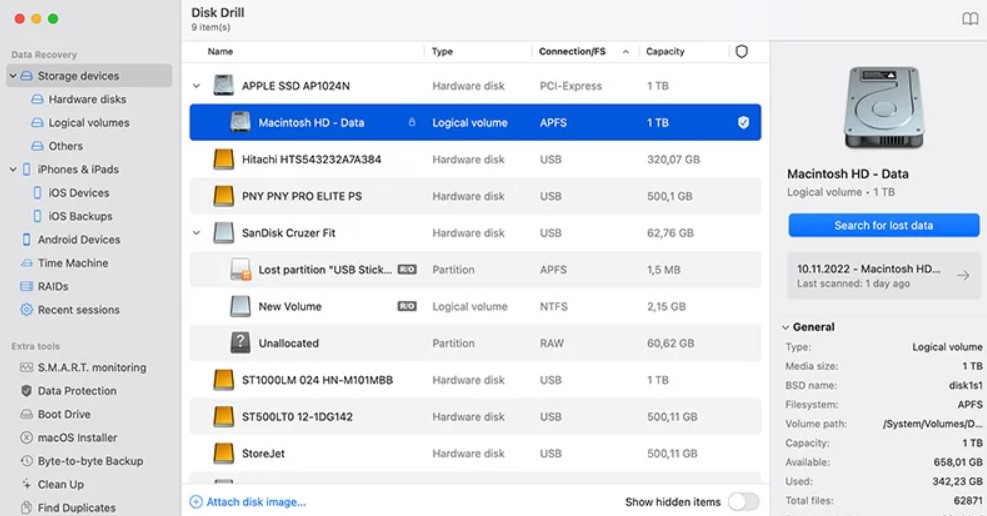
Data recovery software scans storage devices for traces of deleted files by identifying file structures and fragments. It attempts to rebuild these files, allowing Mac users to retrieve lost data. Successful recovery depends on file integrity, time since deletion, and usage of the storage medium. To use data recovery software, follow these steps:
- Download and install a reliable data recovery application (e.g., Disk Drill, Stellar Data Recovery).
- Launch the software and select the drive where the files were deleted.
- Initiate a scan for deleted files.
- Preview the found files, select the ones you want to recover and click “Recover.”
Pros
- Can recover files even after emptying the Trash
- Works for a wide range of file types
- Offers in-depth scanning and recovery options
Cons
- Quality varies among different software options
- Some applications might require payment for full functionality
Unfortunately, data recovery software is not always effective. You can increase your chances of restoring your data using legitimate software like Disk Drill or Stellar Data Recovery.
Method 5: Terminal Command
If you’re comfortable using Terminal, you can recover deleted files using specialized commands. A terminal is a text-based interface interacting with a computer’s operating system. In data recovery, commands like “grep” can search for specific text patterns within files.
Follow these steps to use Terminal to get your files back:
- Launch Terminal (Applications > Utilities > Terminal).
- Enter the command: sudo grep -a -B 400 -A 100 ‘part of the text in the file’ /dev/disk0s2 > ~/Desktop/recoveredfile.txt.
- Replace ‘part of the text in the file’ with a unique string from the deleted file.
- Check your desktop for the recovered file.
Pros
- Provides an alternative for advanced users
- Can recover fragments of text-based files
- Offers in-depth scanning and recovery options
Cons
- Risky for inexperienced users
- Limited success with non-text files
- No guarantee of complete recovery
If you are trying to restore text files, then this is an excellent method. However, it does not work for non-text files; you must also be careful not to damage your Mac!
Method 6: mSpy

mSpy is a monitoring and tracking software primarily designed for parental control and employee monitoring. It allows users to track device activities, including calls, texts, GPS location, social media, etc. It can also recover Mac files as it records all Mac data and allows you to access it anytime via your mSpy account.
Follow these steps to use mSpy to recover Mac files:
- Go to mSpy.com.
- Create an account and purchase a subscription package.
- Download the mSpy on Mac and follow the guided installation.
- Wait a few hours.
- Sign into your mSpy account from any device and instantly view and download all files, including videos, photos, social media messages, and more!
Pros
- Records and saves all types of Mac files
- Does not impact the performance of your Mac
- Takes less than 5 minutes to set up
- Restore Mac files 100% remotely from any device
Cons
- Only works if installed on Mac OS before data loss

mSpy is incredibly easy to use, and its remote tracking abilities allow you to recover your Mac files to any device at the click of a button.
Method 7: Professional Data Recovery Services
If none of the above methods work or your data loss is critical, professional data recovery services can help. Professional data recovery services retrieve lost or damaged data from storage devices like hard drives, SSDs, and flash drives.
They use specialized equipment and techniques to repair, rebuild, or extract data from faulty media. To maximize successful retrieval, recovery experts handle complex cases, such as physical damage or severe data corruption.
To use professional data recovery services, follow these steps:
- Research and contact a reputable data recovery service (e.g., DriveSavers, ACE Data Recovery).
- Send your storage device to the service center.
- The experts will diagnose the issue and provide recovery options.
- If possible, they will recover your deleted files and provide them to you.
Pros
- Highest chance of recovering complex data loss
- Suitable for physically damaged storage devices
- Expert assistance throughout the process
Cons
- Expensive
- May require shipping your device
- Not guaranteed to recover all files
Professional data recovery services should only be used as a last resort. These services can be expensive and will be hit-and-miss if they work.
Can Apple Recover Permanently Deleted Files?
Apple generally does not offer a direct or guaranteed method to recover permanently deleted files on Mac without a backup. When you delete files from a Mac, they are typically moved to the Trash; from there, you can restore them. However, if you have emptied the Trash or used “Secure Empty Trash,” the files are more difficult to recover as their pointers are removed.
Apple’s customer support might provide some limited assistance, but in most cases, they recommend relying on backups. Services like Time Machine can help restore files if you have backups enabled. Apple may suggest contacting professional data recovery services for profound data loss, which can be expensive and not consistently successful.
How to Recover Deleted Files Mac Without Backup?
Recovering deleted files on a Mac without a backup can be challenging, but there are some methods you can try to increase your chances of successful recovery. Keep in mind that the success of these methods varies depending on factors such as the time since deletion, the type of storage medium (HDD, SSD), and the level of activity on the drive after deletion. Here are some tips:
- Act Quickly: The sooner you try to recover deleted files, the better your chances of success. Avoid using the Mac extensively to prevent overwriting the deleted data.
- Check Trash: Deleted files are often moved to the Trash. Open the Trash and search for the files you want to recover.
- Third-Party Recovery Software: Use reputable Mac data recovery software like Disk Drill, EaseUS Data Recovery Wizard, or Prosoft Data Rescue. These tools scan your drive for recoverable files.
- Stop Writing to the Drive: Minimize disk activity, as new data might overwrite the deleted files. Consider booting from an external drive or using the recovery software from another Mac.
- Target Disk Mode: If you have another Mac, connect the two using Target Disk Mode (hold T while booting the deleted Mac). This makes the drive appear external on the other Mac, allowing you to restore lost data.
- Command Line: Terminal commands like “sudo grep” can sometimes be used to recover text-based files, but this requires a good understanding of command-line tools.
- Professional Recovery Services: If the data is crucial and other methods fail, consider professional data recovery services. These can be expensive and are best reserved for valuable data.
- Check Email Attachments: Sometimes, files might have been sent via email. Search your email account for attachments that you may have forgotten.
- Check Other Devices: If you access duplicate files from other devices, they might still be available on those devices.
Conclusion
Accidental file deletion on a Mac is a common predicament, but there are several methods available to recover your lost data. From the simplicity of checking the Trash bin icon to the advanced techniques of data recovery software and professional services, you have a range of options to choose from. Remember that the key to successful recovery is to act quickly and avoid overwriting the deleted Mac files with new data.
FAQ
Can I Get It Back If I Accidentally Delete a File on My Mac?
There’s a chance to recover deleted files on your Mac. The success depends on the method you use, how much time has passed since deletion, and the actions you’ve taken after deletion.
Can I Recover Lost Data After Emptying the Trash?
It’s more challenging but possible. When you empty the Trash, the file’s directory entry is removed, but the data might still exist on the disk until new data overwrites it.
What Is the Safest Method for Recovering Files Without Risking Further Damage?
Time Machine or iCloud Drive for file recovery is generally safe and won’t harm your system or files. Additionally, professional data recovery services ensure expert handling of your situation.
Can I Recover Files from a Damaged Hard Drive?
Professional data recovery professionals specialize in recovering data from physically damaged drives. However, it’s crucial not to attempt DIY recovery on damaged drives as this might worsen the situation.
What Are the Risks of Using Terminal Commands for Data Recovery?
Terminal commands can be risky, especially if you’re unfamiliar with them. Incorrect commands could lead to further data loss or system instability. It’s recommended for advanced users only.
Is There Any Way to Recover Non-Text Files Using Terminal Commands?
Terminal commands primarily work with text-based files. Recovering other file types is generally not possible through Terminal.
What If I Had Not Enabled Time Machine or iCloud Drive Before File Deletion?
In such cases, data recovery software or professional services are your best options for attempting the data recovery process.