Best Free Data Recovery Software for Mac
Join us as we explore the best data recovery software Mac, unraveling their features, ease of use, and effectiveness! How can it be useful for you? Find it out below.
Losing essential files on your Mac OS can ruin your day. Whether you’ve accidentally deleted files, encountered a sudden system crash, or faced a formatting mishap, we’ve got you covered.
Discover the tools that can salvage your data and restore peace of mind no matter how bad your data loss situation is!
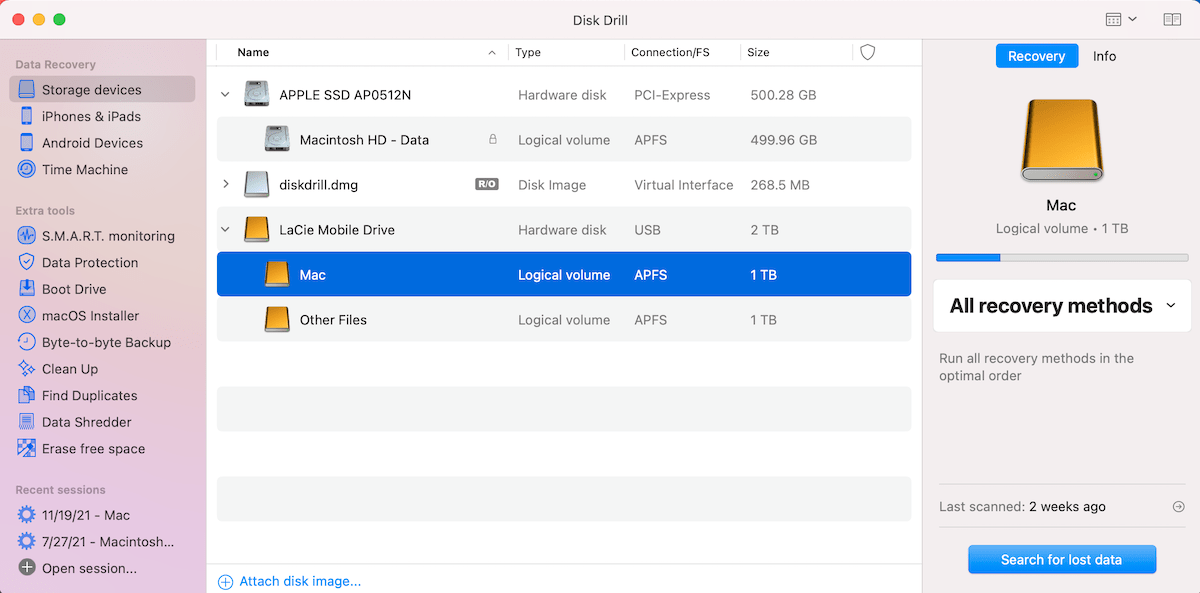
Disk Drill
Disk Drill is user-friendly data recovery software for Mac. It’s versatile for various data loss scenarios with multiple recovery modes, file preview, and S.M.A.R.T. monitoring.
Its free version offers bare recovery, while the paid version provides advanced features like deep scanning and data protection.
Features
Recover deleted, lost, or damaged data, personal or business documents, music, photos, videos, and other files from internal, external, and virtual hard drives, memory cards, iPhones, iPads, Android devices, RAID arrays, and other data sources. Disk Drill excels in data recovery for Mac.
How to Use It?
Follow these steps to put Disk Drill to the test:
- Visit the official Disk Drill website and download the software.
- Double-click the downloaded file to install Disk Drill.
- Follow the on-screen instructions to complete the installation.
- Launch Disk Drill.
- Select Drive to Recover.
- Scan for Recoverable Files.
- Preview Recoverable Files.
- Choose Files to Recover.
- Tap the “Recover” button and choose a destination folder to save the recovered files.
- Recover Files: Click “OK” to start the recovery process. Disk Drill will restore the selected files to the specified location.
- Confirmation: Disk Drill will display a confirmation message once recovery is complete.
Pros
- User-Friendly Interface
- Multiple Recovery Modes
- Comprehensive File Format Support
- Preview Feature
- S.M.A.R.T. Monitoring
- Deep Scan
Below, you can see the top positive and negative users’ reviews about this app:
- Top positive review:
Disk Drill is an amazing experience. I took my daughter on a scuba trip to Palau (South Pacific) and we had some amazing footage of diving with sharks. I stored the video on a 3TB drive and thought I would build a small secure partition to safeguard my data. Turns out I partitioned the entire disk. Neither Minitool nor Easeus could find the 101GB file as well as scores of other files I had stored. I nearly gave up but tried Disk Drill on a whim, right before completely reformatting the drive. I can’t tell you how shocked I was that I was able to completely recover all the files I was missing! I appreciate all that you have made, and I wish you the best.
Amazon
- Top critical review:
Could not recover file names. It is the same company that sells EaseUS which does. Would like a refund.
Amazon
Cons
- Limited Free Version
- Learning Curve for Deep Scanning
- Potential for False Positives
- Limited Support for Older macOS Versions
MiniTool Mac OS Data Recovery
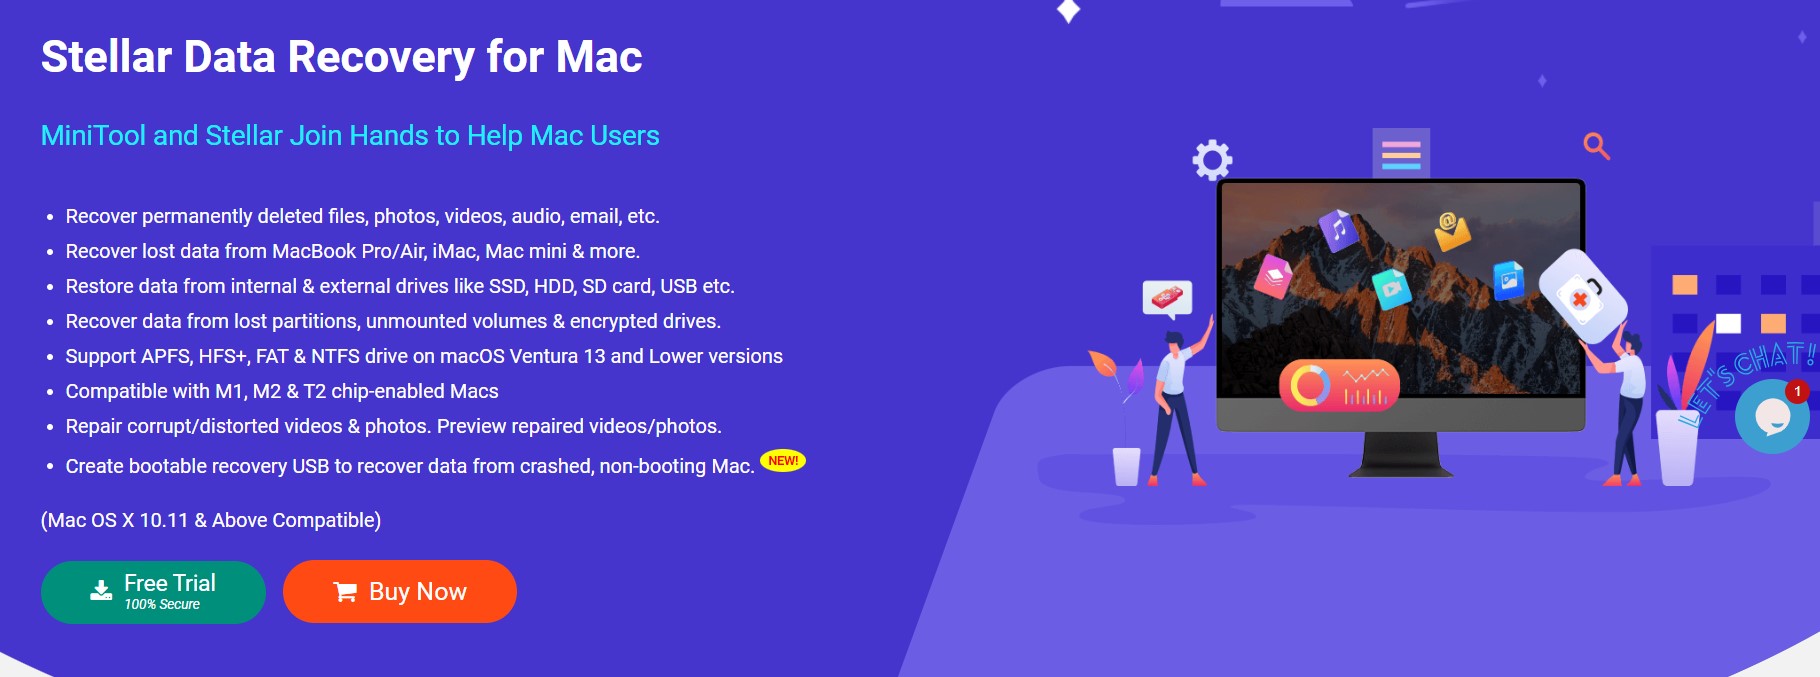
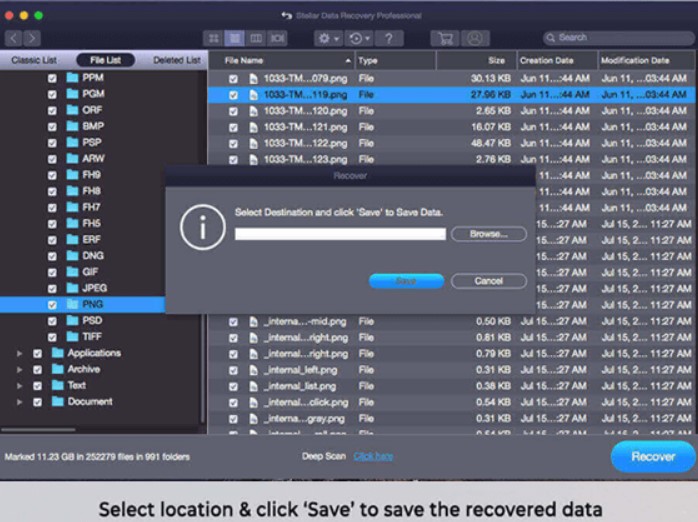
MiniTool Mac Data Recovery is a user-friendly software designed to recover lost data on macOS. It offers versatile recovery modes, an intuitive interface, and support for various file systems, making it suitable for different data loss scenarios.
Features
- Recover files, images, videos, audio & emails emptied from Trash.
- Scan Mac storage drive for free to restore deleted Word, PowerPoint, and Excel files.
- Recover files from native apps like Photos, iMovie, GarageBand, Pages, Keynote, etc.
How to Use It?
To recover lost files on Mac using MiniTool Mac Data Recovery, follow these steps:
- Download MiniTool Mac Data Recovery from the official website.
- Install the software by following the on-screen instructions.
- Launch MiniTool Mac Data Recovery.
- Choose a recovery mode based on your data loss situation.
- Select the drive or partition where you lost files and click “Scan.”
- Select Files to Recover.
- Click “Save” and select a destination to save the recovered files. Avoid saving on the same drive.
- Click “OK” to start the recovery process.
Pros
- User-Friendly Interface
- Versatile recovery modes for different scenarios
- Supports various file systems
- Allows previewing files before recovery
Cons
- Free version has recovery size limitations
- Deep scans can be time-consuming
- Some advanced features may require upgrading to paid versions
- Might not handle complex data loss situations as effectively as specialized tools
We found many good reviews about this app. For example, on Reddit:
- Minitool is absolutely safe. The provided link is to archive.org since MS has removed the download.
TestDisk
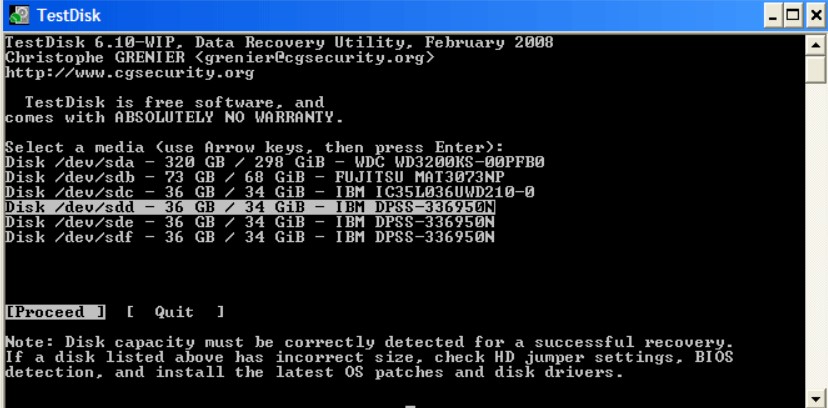
TestDisk is powerful open-source software for data recovery and disk repair. It focuses on recovering lost partitions and repairing file systems, making it a valuable tool for advanced users dealing with data loss or disk issues.
Features
TestDisk can:
- Fix the partition table, and recover the deleted partition.
- Recover FAT32 boot sector from its backup.
- Rebuild FAT12/FAT16/FAT32 boot sector.
- Fix FAT tables.
- Rebuild NTFS boot sector.
- Recover NTFS boot sector from its backup.
- Fix MFT using MFT mirror.
- Locate ext2/ext3/ext4 Backup SuperBlock.
- Undelete files from FAT, exFAT, NTFS, and ext2 filesystem.
- Copy files from deleted FAT, exFAT, NTFS, and ext2/ext3/ext4 partitions.
How to Use It?
To use TestDisk, follow these steps:
- Download TestDisk from its official website.
- Extract the downloaded archive and open the Terminal.
- Use the cd command to navigate to the extracted TestDisk directory in Terminal.
- Run the command ./testdisk to launch the TestDisk interface.
- Choose the affected disk from the list and press Enter.
- Depending on the disk’s partition type, select “Intel” for MBR or “EFI GPT” for GPT partitions.
- Choose “Analyse” to scan for partitions.
- Select “Quick Search” to look for existing sections.
- Use the arrow keys to navigate through found sections.
- Once the correct section is found, select “Write” to restore the partition table.
- After restoring the section, use the ‘P’ key to list files in the partition.
- Navigate to the directory containing lost files and copy them to a safe location using the ‘C’ key.
Pros
- Powerful for partition recovery and repair
- Open-source and free
- Cross-platform compatibility
- Suitable for advanced users and complex cases
Cons
- Command-line interface can be challenging for beginners
- May not handle non-text files as effectively
- Requires technical understanding of partitions and file systems
- No graphical user interface (GUI) for ease of use
The reviews are excellent! Also, we can see a few reviews from Reddit:
- TestDisk is a great little program – If I have a drive that is dying or corrupt I will image it first, then let TestDisk run on the image to recover. Also by the same developer is PhotoRec which is useful if you are just trying to recover a certain type of file (i.e. all *.doc files from an HDD).
- I use TestDisk on an almost regular basis when we need to force decrypt a drive, and the process borks the MBR/partition table. A little-known fact, the Gparted iso has testdisk installed by default.
PhotoRec
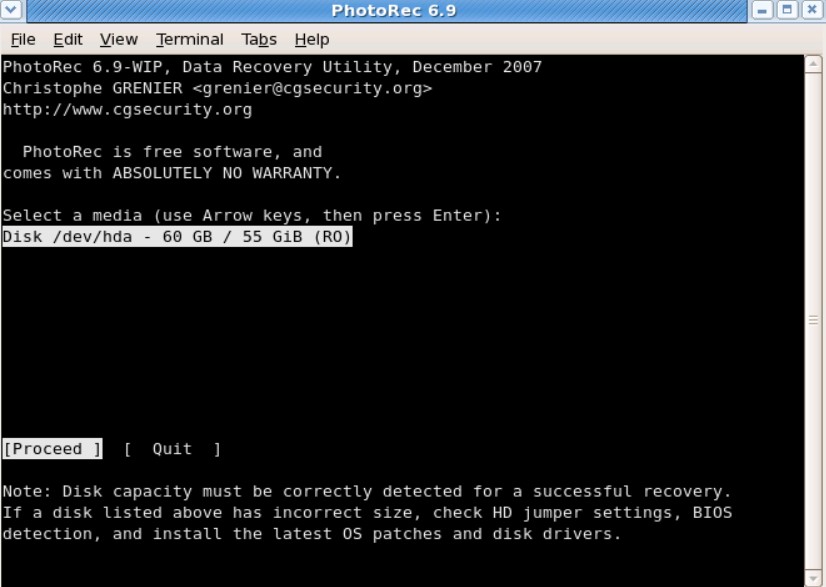
PhotoRec is a renowned open-source file recovery software. It specializes in recovering various file formats from different storage media, including photos. It’s beneficial when you need to retrieve multimedia files lost due to accidental deletion or formatting.
Features
It can recover lost files from at least:
- FAT
- NTFS
- exFAT
- ext2/ext3/ext4 filesystem
- HFS+
How to Use It?
To use PhotoRec, follow these steps:
- Download PhotoRec from its official website.
- Extract the downloaded archive to a location on your Mac.
- Launch Terminal.
- Open the Terminal from Applications > Utilities.
- Use the cd command to navigate to the directory where you extracted PhotoRec.
- Run PhotoRec: Enter the command sudo ./photorec_mac to launch PhotoRec with administrative privileges.
- Select the drive you want to recover files from and press Enter.
- Depending on the partition type, choose “Intel” for MBR or “EFI GPT” for GPT partitions.
- Choose the appropriate filesystem type or select “Other” for unknown filesystems.
- Select recovery options such as “Search” for lost files or “Whole” for whole disk recovery.
- Choose the file formats you want to recover (e.g., JPEG, PNG, DOC) or select “Free” for all forms.
- Specify the directory where recovered files will be saved.
- Confirm your choices and start the data recovery for the Mac OS process by pressing the ‘Y’ key.
Pros
- Open-source and free
- Specialized in recovering multimedia files
- Works on various storage media
- Effective in retrieving files from formatted drives
Cons
- The command-line interface might be challenging for some users
- Limited user interface and no graphical previews
- Advanced settings may require technical understanding
- Doesn’t recover original filenames or directory structures
You can check some Reddit users’ reviews also:
- Photorec and TestDisk have gotten me out of a few tight spots before. I recommend using DDrescue to clone the storage first and then work on a copy of the clone. That way, if the flash/hard drive is failing you get as much data off as you can and don’t have to worry about it finally giving out under you while running tools like Photorec.
- PhotoRec for the win!
Ontrack EasyRecovery
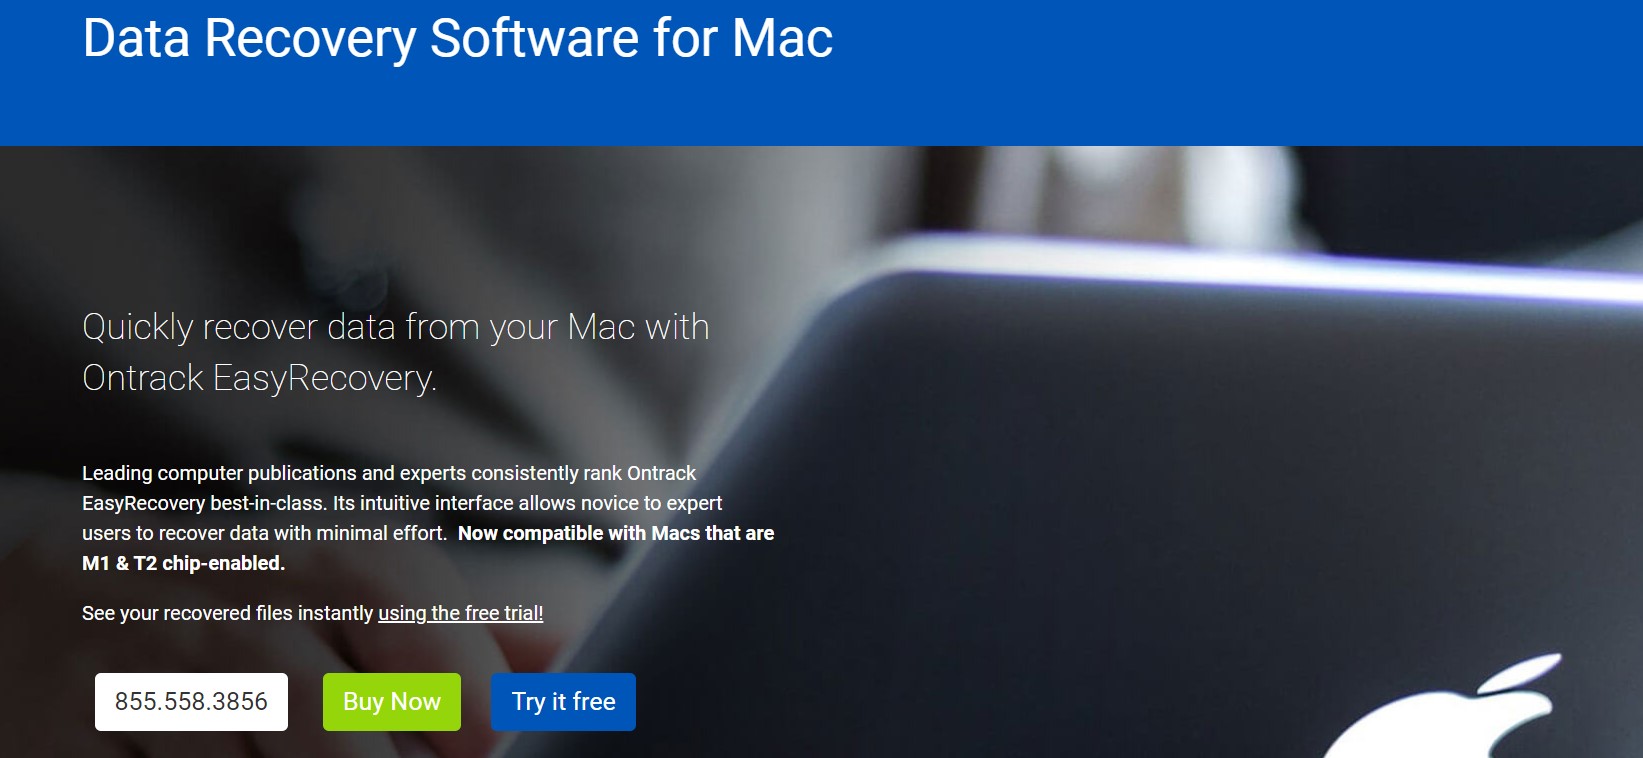
Ontrack EasyRecovery offers comprehensive data recovery solutions for various data loss scenarios. With user-friendly features, it caters to novice and advanced users, aiming to efficiently retrieve lost files and repair disk issues.
Features
- Recover files from emptied trash.
- Recover data from a Mac USB drive.
- Recover data from formatted partition.
- Preview the files before saving them.
How to Use It?
To use Ontrack, follow these steps:
- Download Ontrack EasyRecovery
- Install the software following the on-screen instructions.
- Open the EasyRecovery application after installation.
- Select a recovery mode based on your situation (File Recovery, Recover from Mac).
- Choose the drive or partition.
- EasyRecovery will scan the selected drive for recoverable files.
- After scanning, preview the list of recoverable files.
- Select the files you want to recover by checking their checkboxes.
- Specify a destination on your Mac to save the recovered files.
- Start the recovery process by clicking the “Recover” button.
Pros
- User-friendly interface suitable for various user levels
- Offers different recovery modes for different scenarios
- Provides repair and disk diagnostic tools
- Supports various file systems and storage devices
By the way, Marieke from Trustpilot left a positive review:
- Thanks to Ontrack I got my data back, including priceless photos of our wedding, honeymoon, late dog…worth every penny. Thank you.
Cons
- The free version might have limitations compared to paid editions
- Advanced features might require upgrading to higher-priced versions
- Scanning large drives could be time-consuming
- Recovery effectiveness might vary based on the complexity of data loss
So, some people are not satisfied with this app, for example, Ben who also left a comment on Trustpilot:
- Very poor service. All data recovery companies I approached before Ontrack offered a no success no fee option. Ontrack then sent me a mega quotation of £1,392.00 with the premium service almost double; way over the quotations I had previously received. I was then advised to pay a diagnosis charge, despite already having two previous opinions. So effectively, if they couldn’t do anything with my drive, I would be burning my money and paying for nothing. They then want to charge you £18 to have your drive delivered back to you!!!! Shocking. Would not advise anyone, nor would I advise their partners Western Digital who directed me toward this company.
Lazesoft Mac Data Recovery
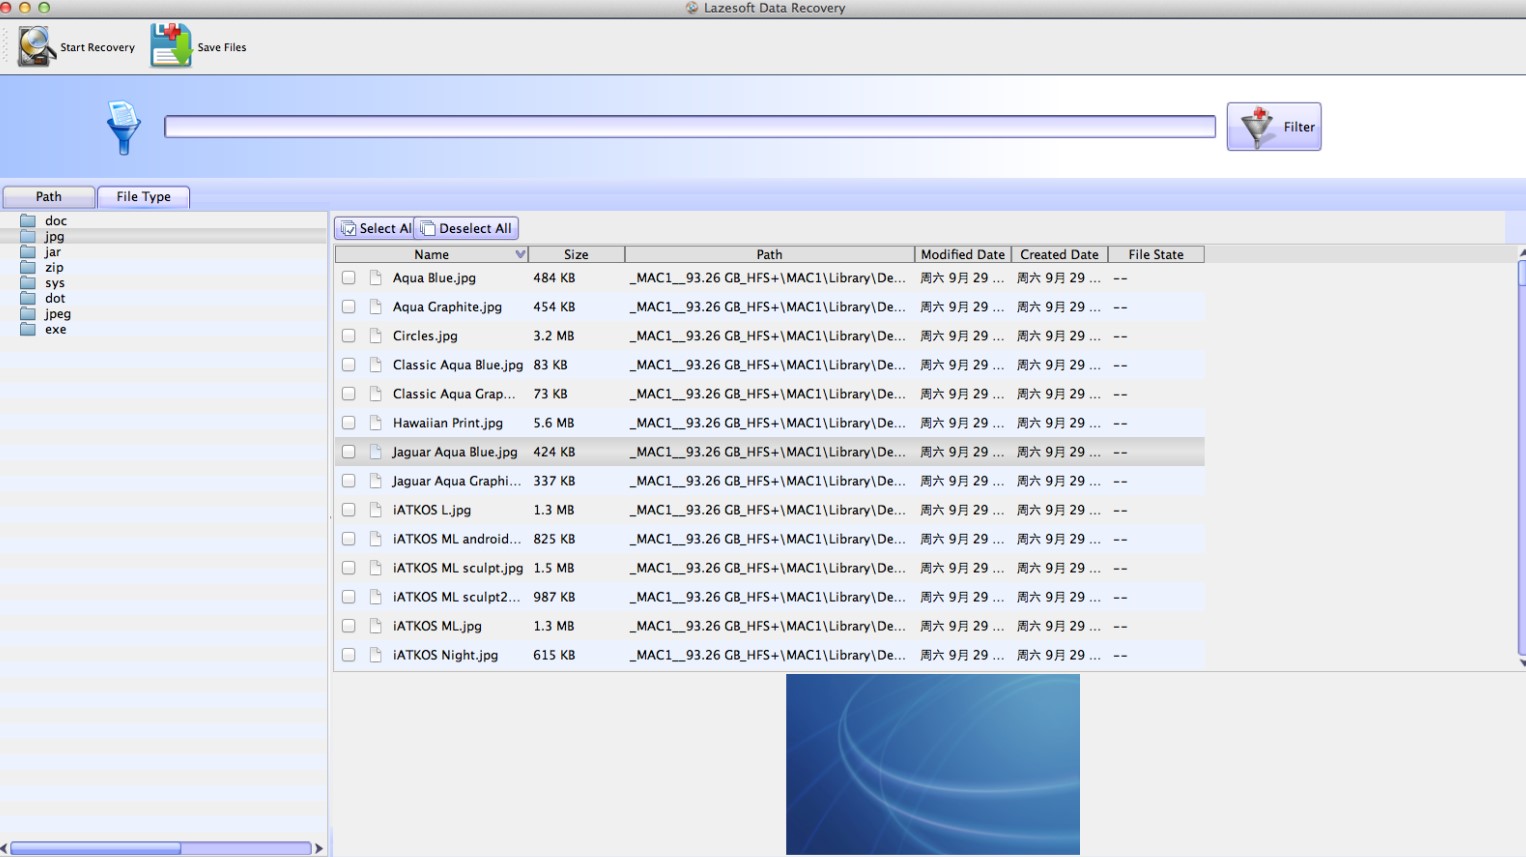
Lazesoft Mac Data Recovery is a user-friendly software for recovering lost files on macOS. It offers various recovery modes and a straightforward interface, aiming to assist users in retrieving data from different data loss scenarios.
Features
- Support EXFAT file system.
- Recover deleted files from EXFAT partition.
- Recover data from formatted EXFAT partition.
- Recover files from damaged or lost EXFAT partitions.
How to Use It?
To use Lazesoft, follow these steps:
- Open the Lazesoft Mac Data Recovery application after installation.
- Select a recovery mode based on your data loss scenario (Deleted File Recovery, Formatted Recovery, etc.)
- Choose the drive or partition from which you want to recover files.
- Lazesoft will scan the selected drive for recoverable files.
- After watching, view the list of recoverable files.
- Specify a location on your Mac to save the recovered files.
- Start the recovery process by clicking the “Recover” button.
Pros
- Intuitive and user-friendly interface
- Offers various recovery modes for different situations
- Allows previewing files before recovery
- Supports a wide range of file formats
Cons
- It may not have the same level of effectiveness as specialized data recovery tools
- Recovery success might vary based on the complexity of data loss
- Limited advanced features in the free version
- Potential compatibility issues with newer macOS versions
Let’s look at Reddit users’ reviews:
- As far as I’m aware, but could be wrong, I think it’s just a Gui method of doing the stock standard bootrec/rebuildbcd type commands. You’re basically paying for the button to click that runs those commands. If it’s recoverable, the cmd commands will be all you need.
- The version of Lazesoft that is included is specifically for data recovery – deleted files and the like. I haven’t actually used it, I’ve had much better experiences with DMDE and GetDataBack.
Exif Untrasher
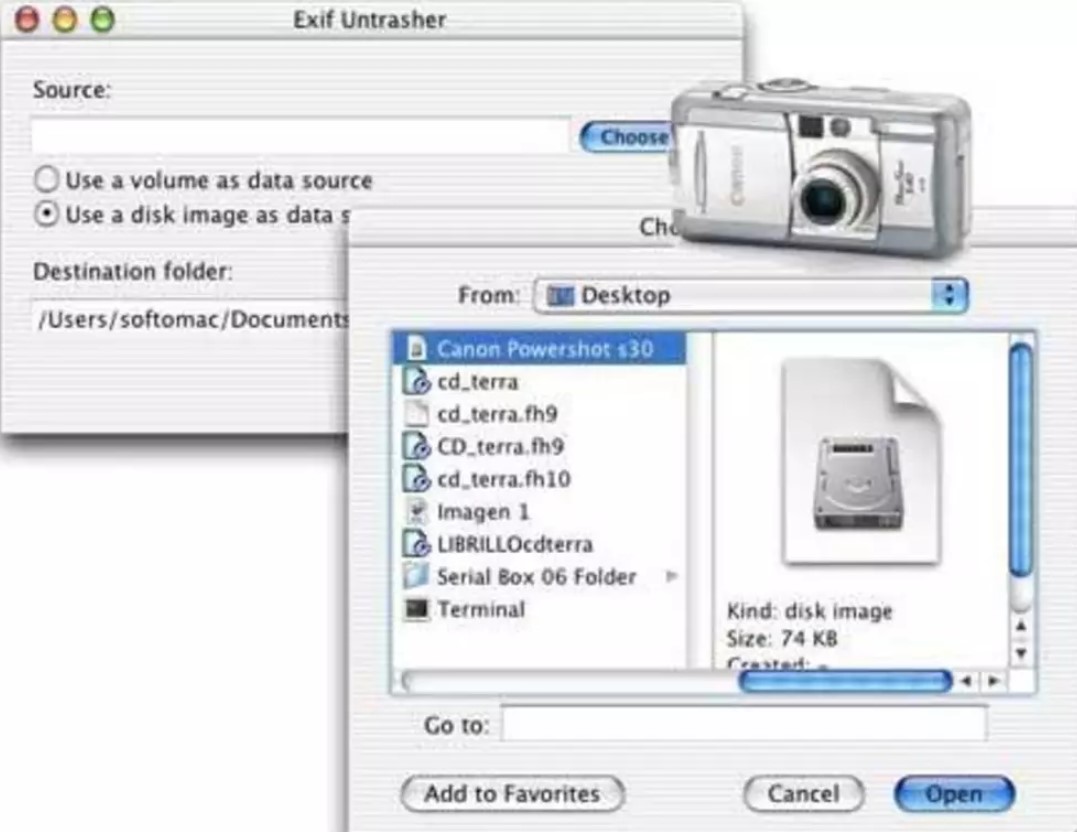
Exif Untrasher is a specialized tool for recovering deleted photos from digital cameras and memory cards. It focuses on restoring images based on their metadata, making it ideal for photographers dealing with accidental photo deletions.
Features
Exif Untrasher is a tool for rescuing JPEG photos deleted from digital cameras’ memory cards or sticks. Usually, it can even be used to recover images from cards that have been formatted.
How to Use It?
To use Exif Untrasher, follow these steps:
- Open the downloaded .dmg file and drag the app to your Applications folder.
- Open the Exif Untrasher application from the Applications folder.
- Select the drive or device where you want to recover photos and Click the “Scan” button.
- After scanning, preview the list of recoverable photos.
- Select the photos you want to recover by checking the checkboxes.
- Click the “Recover” button to initiate the recovery process.
Pros
- Simple interface
- Specialized in recovering deleted photos
- Focuses on photo recovery based on metadata
- Suitable for photographers and users dealing with accidental photo deletions
Cons
- Limited scope: Primarily focuses on photo recovery
- May not be as versatile as other general data recovery tools
- Effectiveness depends on the availability of intact metadata
- May not handle complex data loss scenarios as effectively
We can investigate some reviews on Reddit:
- Is there a way to recover deleted photos from a hard drive? Although that’s probably an iPhoto issue. A friend tried updating iPhoto and she lost almost every picture she had, her iPhoto “file” was kind of restarted or something.
DMDE Free Edition
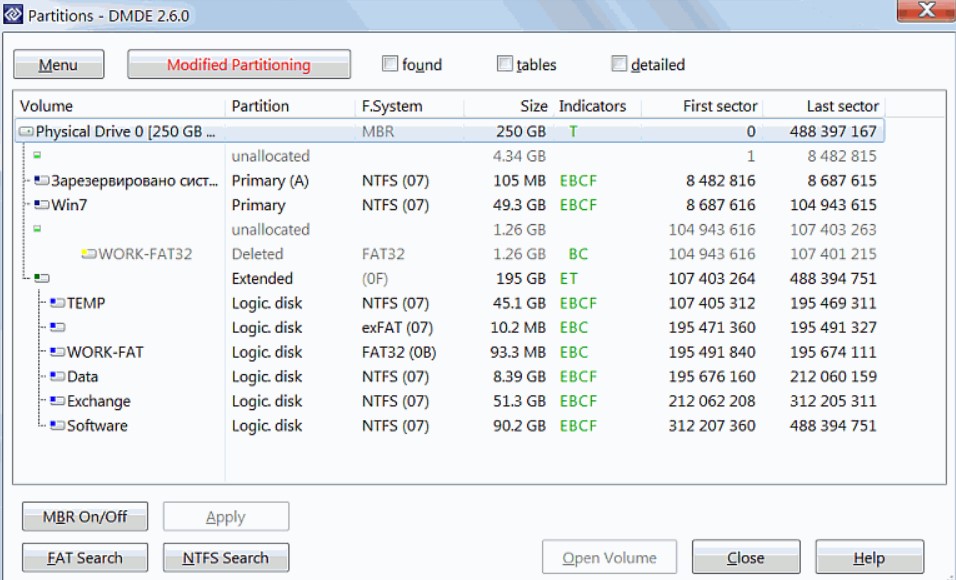
DMDE Free Edition is a data recovery software that offers basic recovery features for various file systems. It aims to help users recover lost or deleted files from different storage media on macOS.
Features
DMDE has several freeware features, such as a disk editor, a simple partition manager (e.g., allows partition undeleting), a tool to create disk images and clones, a RAID constructor, and file recovery from the current panel. Paid editions support file and directory recovery without restriction. DMDE Professional Edition has additional features to recover data for clients.
DMDE supports NTFS, FAT12/16, FAT32, exFAT, Ext2/3/4, HFS+/HFSX, ReFS, APFS, btrfs and runs on Windows, Linux, macOS, and DOS.
Algorithms of thorough search and analysis effectively reconstruct directory structure and recover files after some complex file system damages (such as format, partition manager failure, and others). It is possible to find data quickly without a full scan in the case of minor filesystem damage.
Data recovery by file signatures (Raw-recovery) is added to cover cases when recovery by file system is impossible.
How to Use It?
To recover files on Mac using DMDE Free Edition, simply:
- Download DMDE Free Edition from its official website.
- Extract the downloaded archive and open the DMDE application.
- Select the drive or partition where you lost files.
- Click “Open Disk” to scan for sections on the selected industry.
- Choose the area where your lost files were stored.
- Click “Open” to search for files within the selected partition.
- Select the files you want to recover.
- Click “Extract” to initiate the recovery process.
Pros
- Offers basic data recovery features for free
- Supports various file systems
- Provides the ability to search for specific files
Cons
- Free version has limitations compared to paid editions
- Interface is less user-friendly for novice users
- Deep scans can be time-consuming
- Recovery effectiveness could vary based on data loss complexity
Look at users’ feedback from Reddit:
- You can recover up to 4000 files from one folder per run with the free version of DMDE. If you accidentally deleted a partition, you can re-insert it to regain access to everything with the original directory structure in the free version. If you need to recover a complex folder tree and it’s too annoying to do it one folder at a time, the paid version will do that for $20 USD. The next cheapest tool I’d RAISE, which is $25 USD I believe.
SoftTote Mac Data Recovery
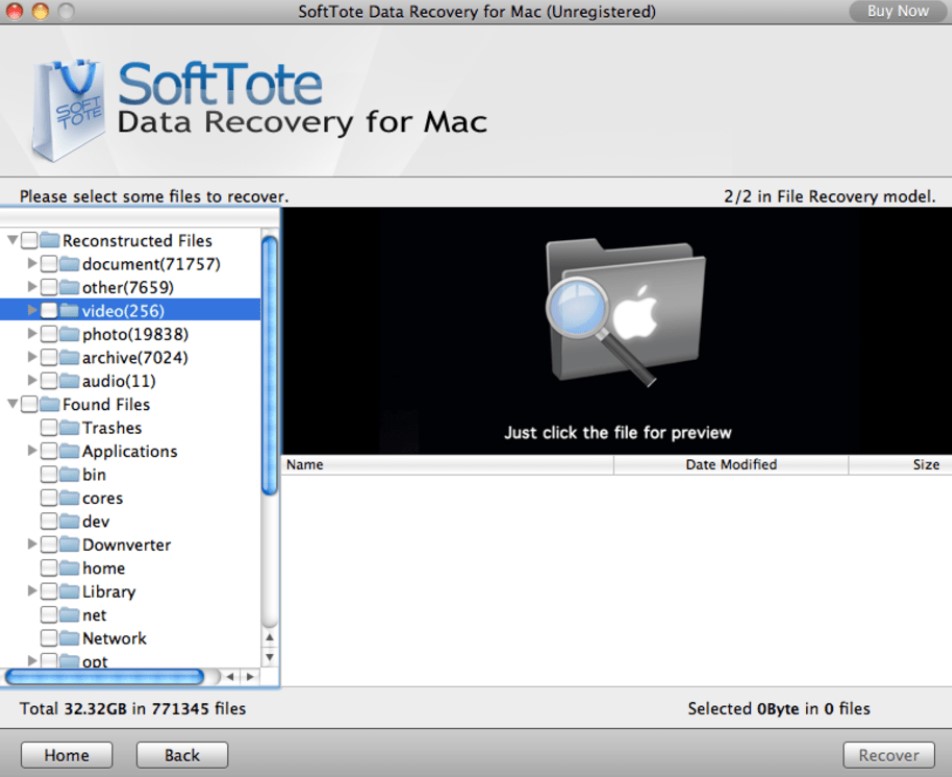
SoftTote Mac Data Recovery is a user-friendly software designed to recover lost data on macOS. It offers various recovery modes for different scenarios and supports multiple file systems. Users can scan, preview, and restore files, making it a practical choice for data retrieval.
Features
SoftTote Data Recovery for Mac is a powerful software that provides deep scanning and nondestructive data recovery.
How to Use It?
To use SoftTote, follow these steps:
- Install Softtote.
- Launch the software.
- Choose a recovery mode.
- Scan the drive.
- Preview.
- Recover files.
Pros
- Comprehensive recovery modes
- Supports different file systems
Cons
- Some users report slower scan speeds
Explore reviews about the app from Softonic:
- Completely Free Data Recovery Software for Mac OS X/macOS. That’s the 100% free Mac recovery tool I’ve ever tried. Wonderful!
mSpy
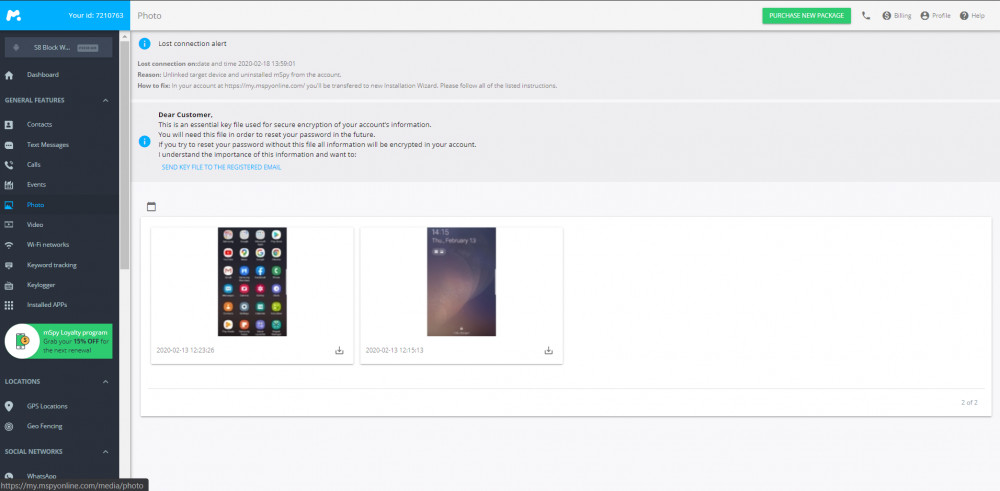
mSpy is monitoring software that tracks and manages a target device’s activities remotely. It offers features like call and message monitoring, GPS tracking, and social media tracking and can instantly record photos, videos, and other files on Mac.
Features
Even though mSpy is mainly used as a tracking app, it can be used to recover lost data. Even better, you can access your Mac files remotely on any device on your mSpy account.
How to Use It?
To recover deleted files using mSpy, simply:
- Create an account on the mSpy website and purchase a subscription
- Access the Mac you want to monitor and obtain physical access to it.
- Log in to your mSpy account and follow the provided installation instructions.
- Download and install the mSpy software on the target Mac.
- Follow the on-screen prompts to complete the installation process. You might need to grant necessary permissions to the app during setup.
- Once the app is installed and set up, log in to your mSpy account with an internet connection from any device.
- Access the mSpy dashboard to view the collected data and monitor the target Mac’s activities.
- Explore the dashboard to access monitoring features such as call logs, text messages, browsing history, photos, videos, and more.
Pros
- Recover Mac files from any device
- Recover deleted data 100% remotely
- Works for all types of files, including videos, photos
Cons
- mSpy must be installed before data loss occurs to successfully recover files
Users gave this app very good reviews on Trustpilot:
- MSPY is very helpful to me. It helps me to ease my anxiety and worries. It can detect any phone activity. Highly recommended phone spying app! The best and easiest to install! AND THEIR CUSTOMER SERVICE IS SUPERB!
How to Choose the Best Free Data Recovery Software for Mac?
Choosing the best accessible data recovery software for Mac requires careful consideration of your needs, the software’s features, ease of use, and reliability. Here’s what you need to do:
- Identify Your Requirements: Determine the type of data you need to recover, whether photos, documents, videos, or a mix of files. Also, consider whether you need to recover data from a specific storage medium like a hard drive, SSD, or USB drive.
- Research Available Options: Look for reputable data recovery software options compatible with Mac. Consider popular choices like Disk Drill, Recuva, TestDisk, and others.
- Check Compatibility: Ensure the software you’re interested in is compatible with your Mac’s operating system version and the type of storage media you’re trying to recover from.
- Read Reviews and Ratings: Look for user reviews and ratings online. Pay attention to both positive and negative feedback to get a balanced understanding of the software’s performance and reliability.
- Review Features: Compare the features offered by each software. Look for features such as deep scanning, preview options, support for various file formats, and the ability to recover data from different scenarios (e.g., accidental deletion, formatted drives).
- Ease of Use: Opt for software with an intuitive and user-friendly interface. Complex tools might be powerful but hinder your recovery efforts if they’re too tricky to navigate.
- Scan and Recovery Speed: Consider the scanning and recovery speed of the software. Some tools offer quick scans for faster results, while others provide more thorough but time-consuming scans.
- Data Preview: A good data recovery software should allow you to preview the recoverable files before restoring them. This helps you ensure that you’re recovering the correct files.
- Limitations of the Free Version: Understand the rules of the free version of the software. Some tools might restrict the amount of data you can recover, or advanced features only available in the paid version.
- User Support and Documentation: Check if the software offers user support or documentation. Access to guides, tutorials, and customer support can be valuable if you encounter any issues.
- Try Multiple Options: If possible, try a few different software options to see which works best for your case. Some software might be more effective in specific scenarios than others.
Can Data Recovery Be Performed on All Versions of Mac OS?
Data recovery software compatibility can vary depending on your macOS version. In general, most data recovery software is designed to work with various macOS versions, but there might be some limitations. Here’s a general overview:
Data recovery software tends to be more compatible with the latest macOS versions. Developers update their software to work with the most recent operating systems. If you’re using a current macOS version, you’re more likely to find data recovery software that supports it.
While many data recovery tools work with older macOS versions, compatibility might become an issue as the operating system becomes outdated. Some software updates might not be compatible with older macOS releases, making finding tools that work seamlessly harder.
When looking for data recovery software, check the software’s official website for compatibility information. Most reputable software providers will mention which macOS versions their software supports.
What Are Other Methods to Recover Files on Mac?
Data recovery software isn’t the only way to recover files on Mac. You can also try these methods:
- Time Machine Backup: If you’ve set up Time Machine, you can restore files from your backup to a previous point in time.
- iCloud or Cloud Storage: Check your iCloud or other cloud storage accounts, as files might be synced and accessible there even if deleted locally.
- External Storage Devices: If you’ve transferred the files to an external drive or USB, check those devices for a copy of the lost files.
- Previous Versions: Some apps automatically create versions of documents. Right-click on a file and choose “Restore Previous Versions.”
- File Sharing Services: If you’ve shared the file using services like Dropbox or Google Drive, the file might still be available there.
- Temporary Folders: Some applications store temporary copies of files. Check temporary folders related to specific apps.
- Data Recovery Services: As a last resort, consider professional data recovery services if the data is crucial. They can recover data from physically damaged drives.
- It can be interesting for you: How to recover data on the iPhone?
FAQ
Can I Recover Permanently Deleted Files on a Mac OS Without Backup?
Sometimes, you can recover permanently deleted files on a Mac computer using data recovery software. However, success depends on factors like the time since deletion and storage medium type.
What Is the Best Free Data Recovery Software for Mac?
Several options include Disk Drill, Recuva, TestDisk, and more. The best choice depends on your specific needs and preferences.
How Do I Use Data Recovery Software on Mac?
Typically, you install the Mac file recovery software, select the storage device, initiate a scan, preview the recoverable files, and then choose what to restore. The exact steps vary based on the software.
What Types of Files Can I Recover with Data Recovery Software?
Most data recovery software can recover many files, including documents, photos, videos, audio files, etc.
Can I Recover Files from a Formatted Drive?
Some data recovery tools have the ability to recover data from formatted drives. However, the success rate may vary based on the tool and the extent of formatting.